# DMX-SR2112
Warning
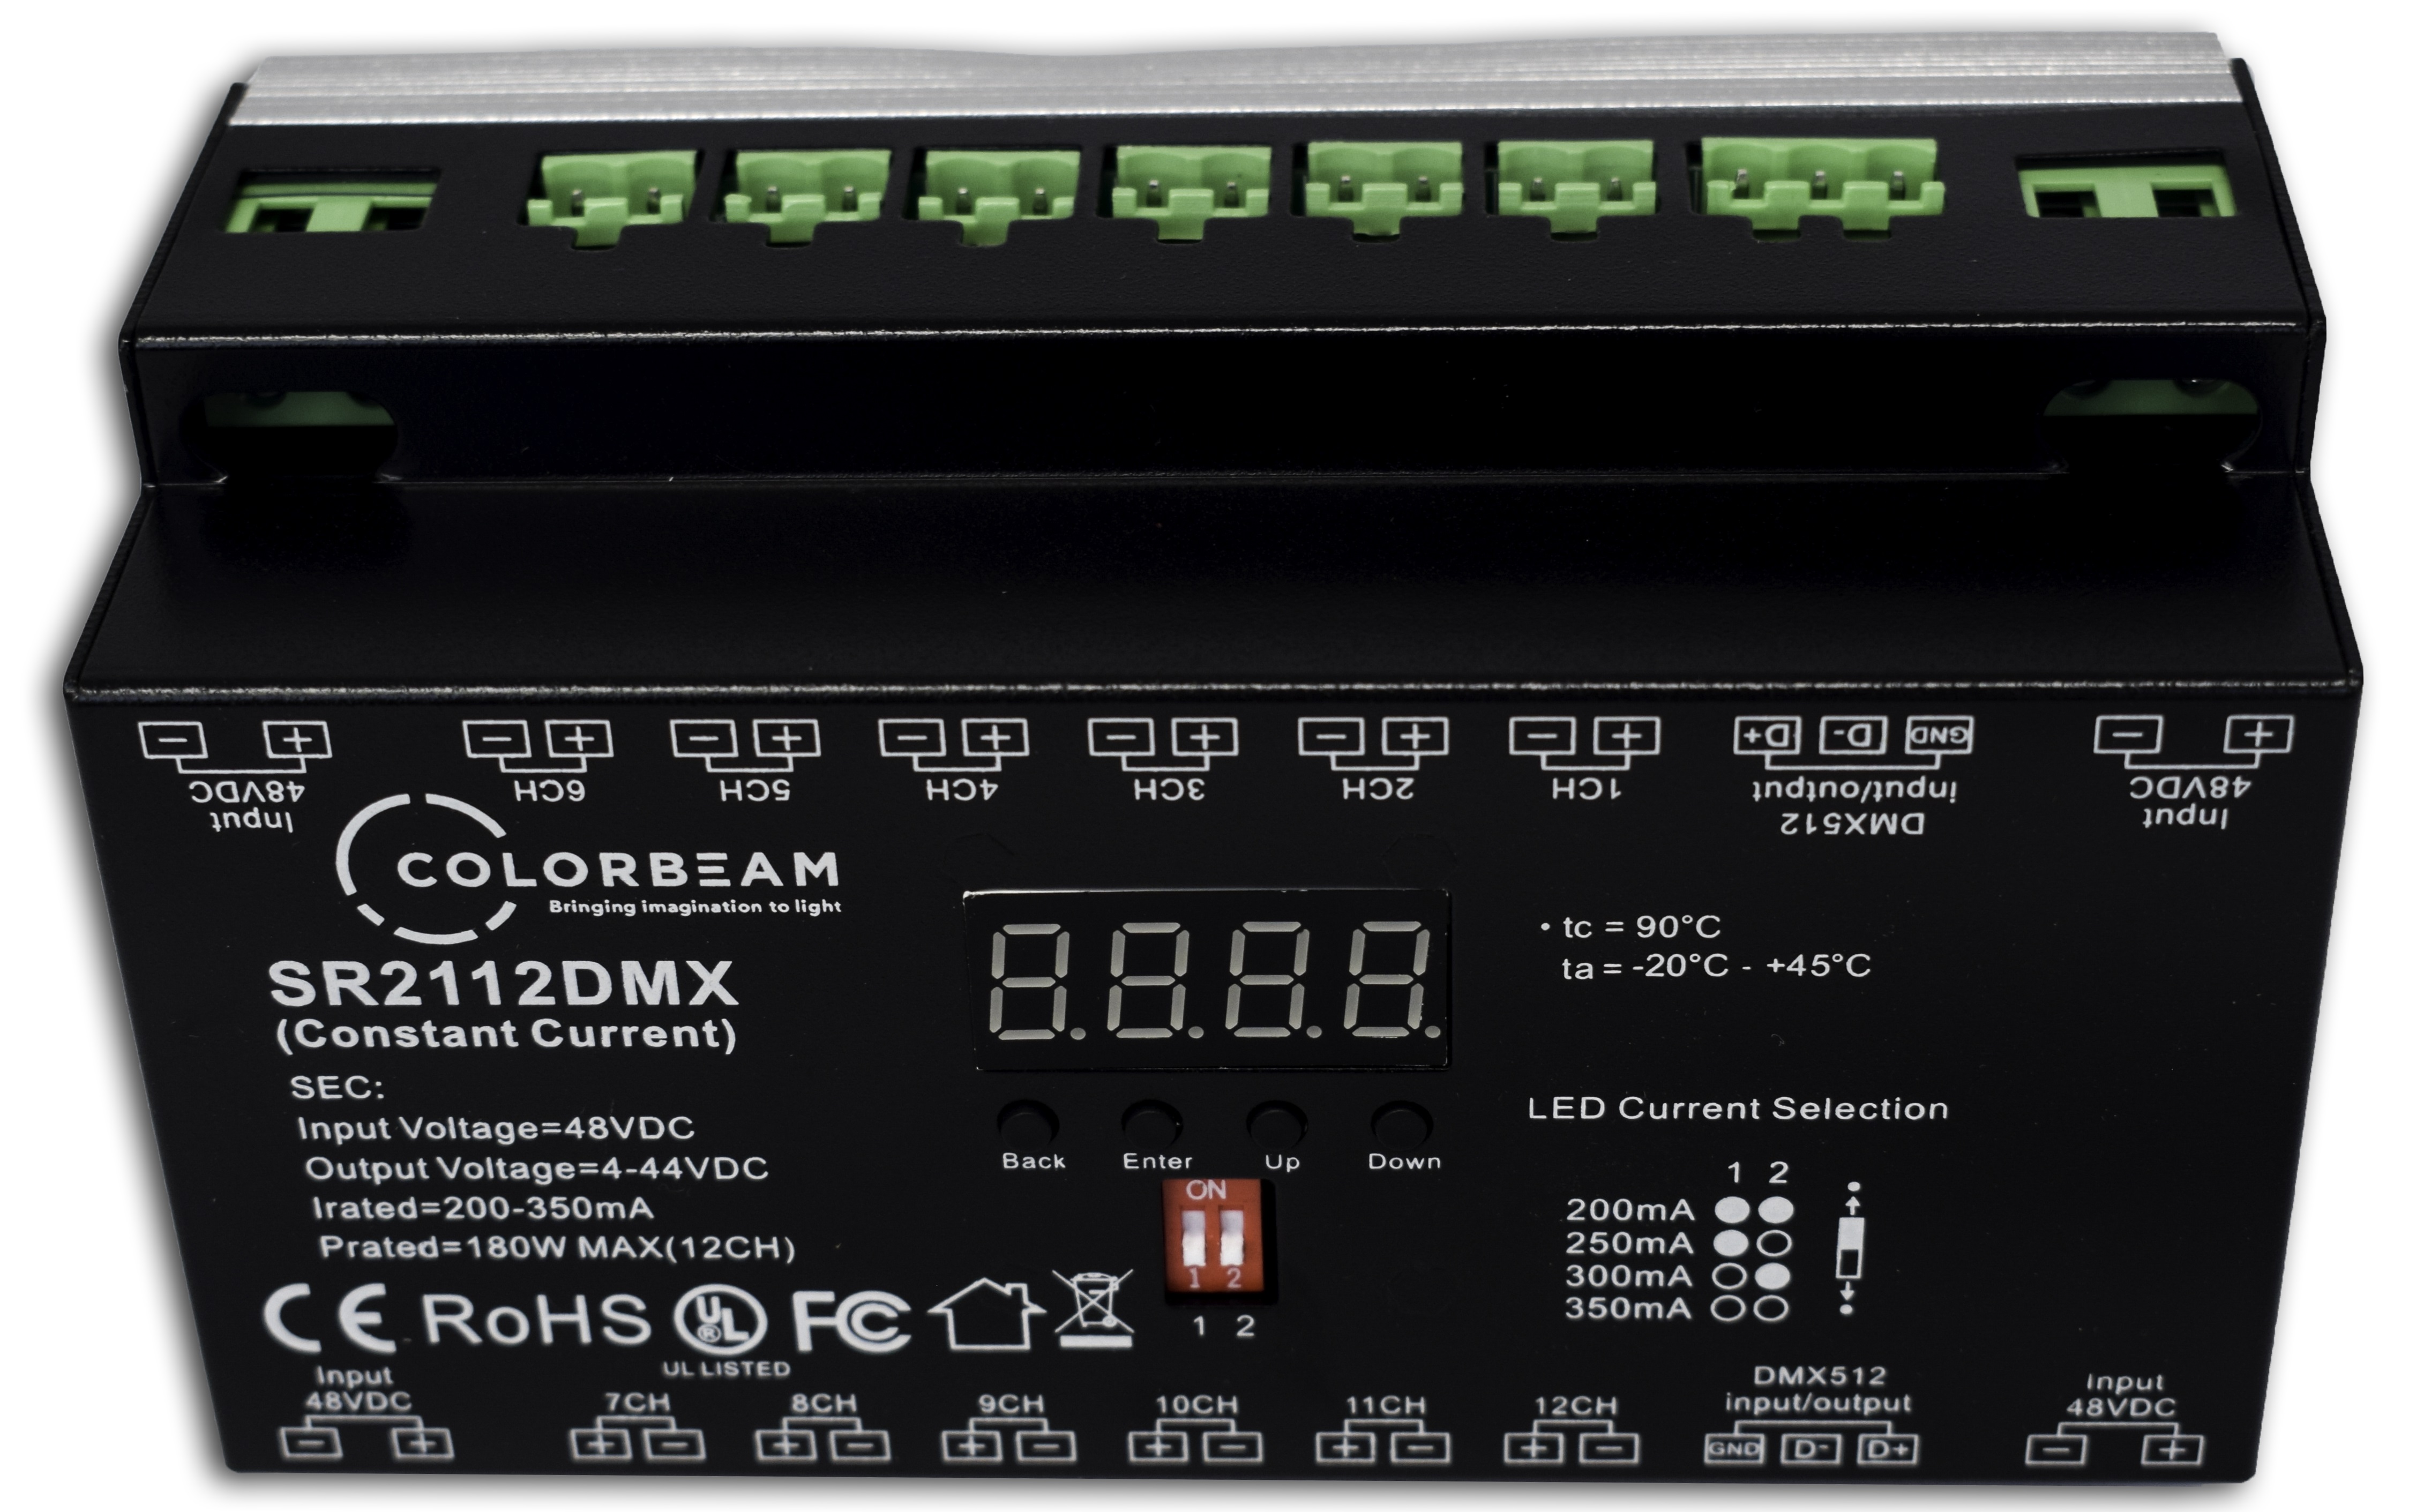
All our DMX-SR2112 drivers come set to 200 milliamps. When using bi-white lights with this driver, 200 milliamps is the required setting. The RGB lights need 350 milliamps to work properly.
Therefore, bi-white and RGB lights cannot be installed on the same DMX-SR2112.
This DMX driver does not have a built in power supply. Use the PS-SR2112-96 to power it.
# Features
- Din Rail mounted into Enclosure
- 12 Independent channels
- Self programmable
- 4 Different milliamp settings
- Test Mode
Warning
When connecting two PS-SR2112-96, one power supply will power the top row of channels, and the second will power the bottom. Make sure to distribute power evenly. Flip the switch on the left side of the driver from 1PS to 2PS (make sure there is no power running to the device when you do this).
# Settings
- Always use CH 12 setting (Press "Up" until CH is shown, then "Enter", then "Up" until CH12 is shown, then "Back" to confirm your settings)
Change your drivers DP setting depending on what type of lights you are using: Press up until ‘DP’ is shown, then click "Enter", and when the display is flashing, select 3.2 for bi-whites, 4.3 for RGB lights, and 5.4 for RGBW lights. Press "Back" to confirm your settings.
Set the driver’s first DMX address. Press the "Up" button until ‘A’ is displayed. Press “Enter”. When the display flashes click or hold the "Up" or "Down" buttons to select the starting DMX address desired. Click the "Back" button to confirm your new settings. When there is a dot after the ‘A’, this means the device is receiving DMX signal successfully.
As shown in the chart below, in 3.2 DP mode the SR2112 uses 18 DMX addresses, in 4.3 mode it uses 20 DMX addresses, and in 5.4 mode it uses 15 addresses. This means your drivers have to be addressed this many numbers apart (Ex: 1st driver: Address 11, 2nd: 31, 3rd: 51).
| DMX | DP 1.1 | DP 3.2 (For Bi-White) | DP 4.3 (For RGB) | DP 5.4 (For RGBW) |
|---|---|---|---|---|
| 1 | Output dimming 1 | Output dimming 1 (Warm) | Output dimming 1 (RED) | Output dimming 1 (RED) |
| 2 | Output dimming 2 | Output dimming 2 (Cold) | Output dimming 2 (GREEN) | Output dimming 2 (GREEN) |
| 3 | Output dimming 3 | Control level 1 & 2 | Output dimming 3 (BLUE) | Output dimming 3 (BLUE) |
| 4 | Output dimming 4 | Output dimming 3 (Warm) | Control level 1 & 2 & 3 | Output dimming 4 (WHITE) |
| 5 | Output dimming 5 | Output dimming 4 (Cold) | Strobe effect 1 & 2 & 3 | Control level 1 & 2 & 3 & 4 |
| 6 | Output dimming 6 | Control level 3 & 4 | Output dimming 4 (RED) | Output dimming 5 (RED) |
| 7 | Output dimming 7 | Output dimming 5 (Warm) | Output dimming 5 (GREEN) | Output dimming 6 (GREEN) |
| 8 | Output dimming 8 | Output dimming 6 (Cold) | Output dimming 6 (BLUE) | Output dimming 7 (BLUE) |
| 9 | Output dimming 9 | Control level 5 & 6 | Control level 4 & 5 & 6 | Output dimming 8 (WHITE) |
| 10 | Output dimming 10 | Output dimming 7 (Warm) | Strobe effect 4 & 5 & 6 | Control level 5 & 6 & 7 & 8 |
| 11 | Output dimming 11 | Output dimming 8 (Cold) | Output dimming 7 (RED) | Output dimming 9 (RED) |
| 12 | Output dimming 12 | Control level 7 & 8 | Output dimming 8 (GREEN) | Output dimming 10 (GREEN) |
| 13 | Output dimming 9 (Warm) | Output dimming 9 (BLUE) | Output dimming 11 (BLUE) | |
| 14 | Output dimming 10 (Cold) | Control level 7 & 8 & 9 | Output dimming 12 (WHITE) | |
| 15 | Control level 9 & 10 | Strobe effect 7 & 8 & 9 | Control level 9 & 10 & 11 & 12 | |
| 16 | Output dimming 11 (Warm) | Output dimming 10 (RED) | ||
| 17 | Output dimming 12 (Cold) | Output dimming 11 (GREEN) | ||
| 18 | Control level 11 & 12 | Output dimming 12 (BLUE) | ||
| 19 | Control level 10 & 11 & 12 | |||
| 20 | Strobe effect 10 & 11 & 12 |
# Using Test Mode (Run2)
In run2 mode you can test each channel, meaning each color the bulb should be emitting.
- To enter this mode press "Up" on your SR2112 until “run1” is shown, press “Enter”, then “Up” so "run2" is showing, then “Back” to confirm your setting.
- Power cycle the device, meaning unplugging and plugging it back in again, after changing this setting.
- To test your first channel, press "Up" until “1.00” is shown, then press "Enter".
- When the display is flashing push the “Up” button to increase the brightness of this channel. When “FL” is shown it means the channel is at its full brightness.
- To turn this channel off press "Up" or "Down" until you get back to "1.00".
- To test the second channel press "Back", press "Up" until "2.00" is shown, then press "Enter", and then hold the “Up” button to increase this channel's brightness.
- Repeat until all your desired channels have been tested.
- To have the driver listen to DMX, put the driver back in "run1" mode and power cycle the device.
Note: When the driver is in "Run2" mode it will send DMX to all devices connected to it. If you don't want your other devices affected, make sure your run2 driver is not DMX daisy chained to other drivers.