# How to configure the Gateway
The Colorbeam Gateway processor delivers the ability to tune lights via a DMX driver.
You will need to make sure that the Gateway has access to an IP network so you may connect to it via its web interface. The Gateway's web interface is what allows you to configure lighting loads and scenes, which can then be triggered by the Gateway or third party systems.
Note
Only once a load is part of a scene will it be properly available on the interactive page.
To configure the Gateway, you will need to first create rooms. Rooms are a method of categorizing the different loads that your DMX network contains. Scenes (different lighting settings) then need to be created to command specific loads. Once scenes are assigned to buttons on our virtual keypads, you may then switch between scenes.
Note
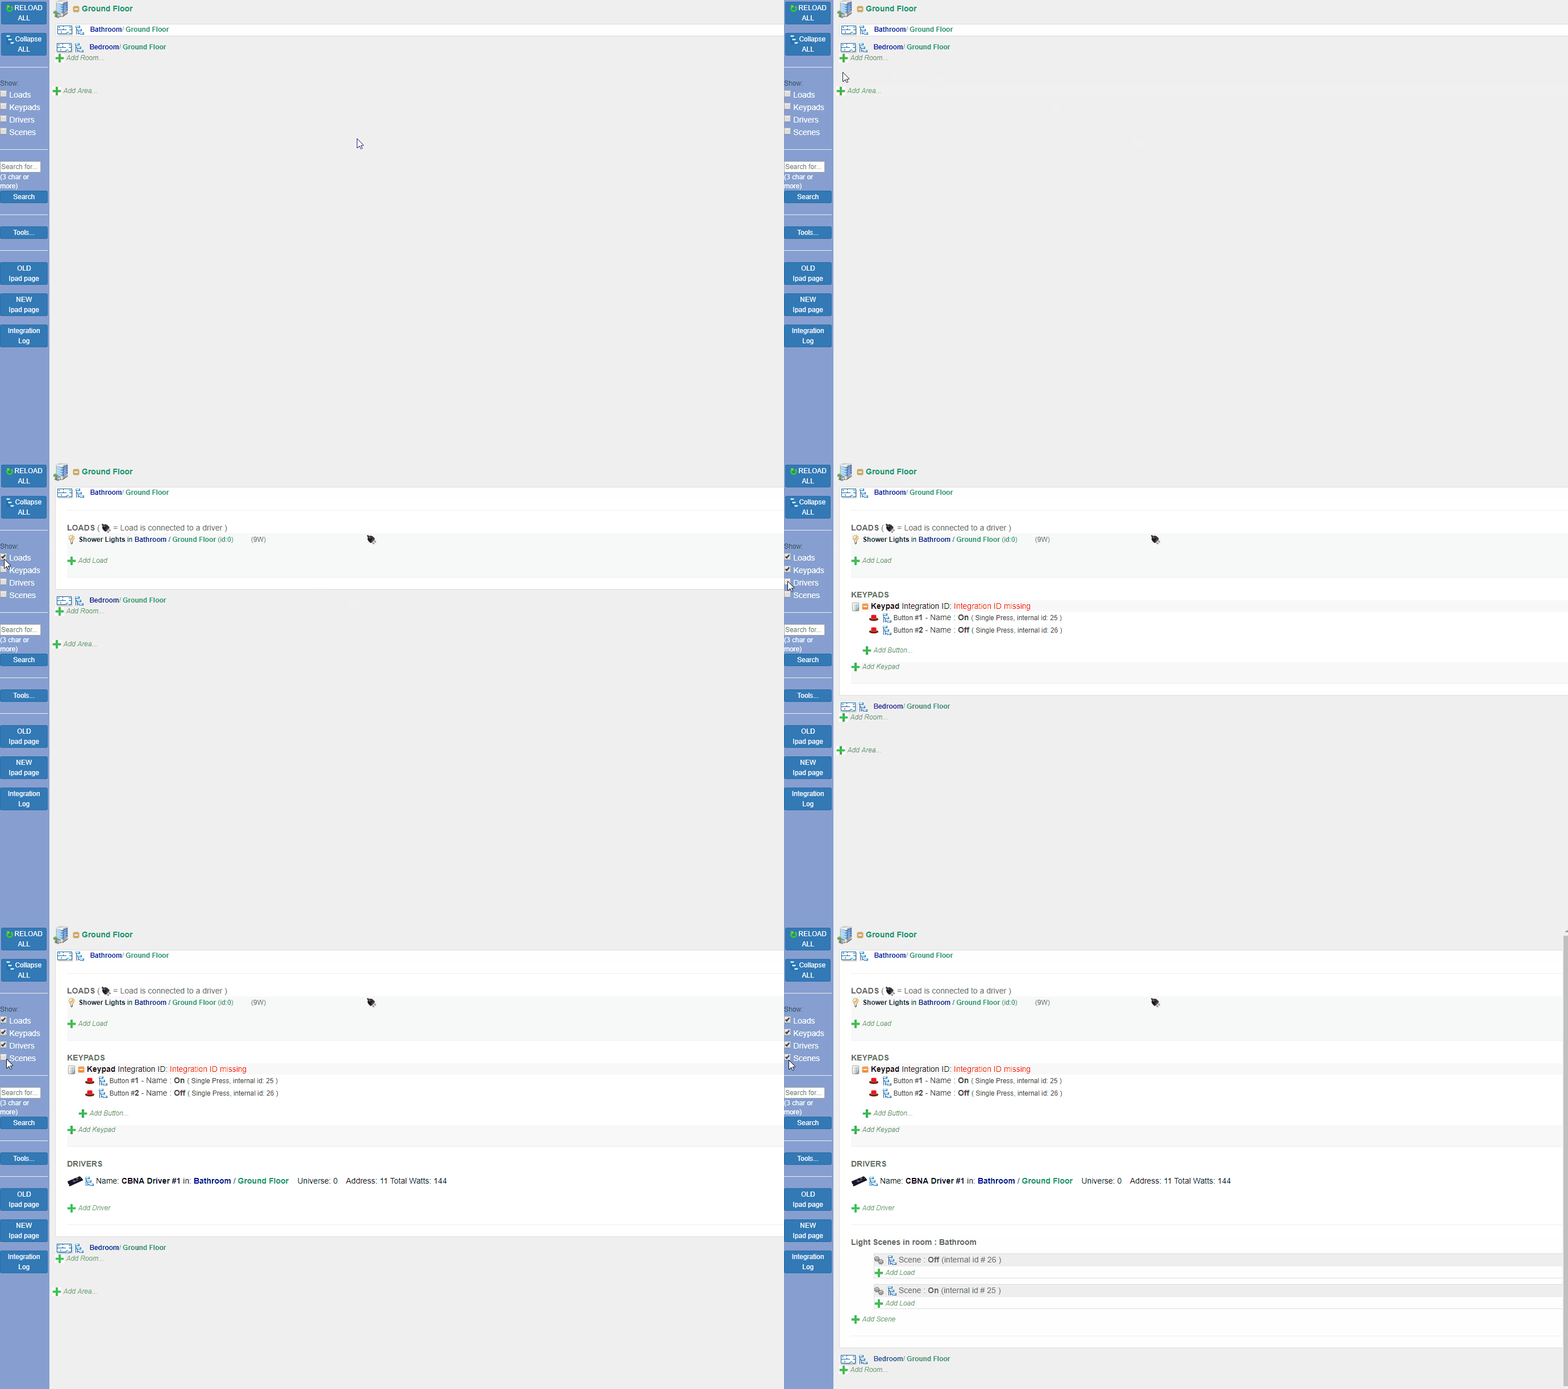
If you seem to be missing a section in the Gateway's page, make sure to check the boxes on the left.
Warning
You will need a mouse and keyboard to use the Gateway's configuration page. Use of a tablet or mobile phone is not recommend.
# Create Areas and Rooms
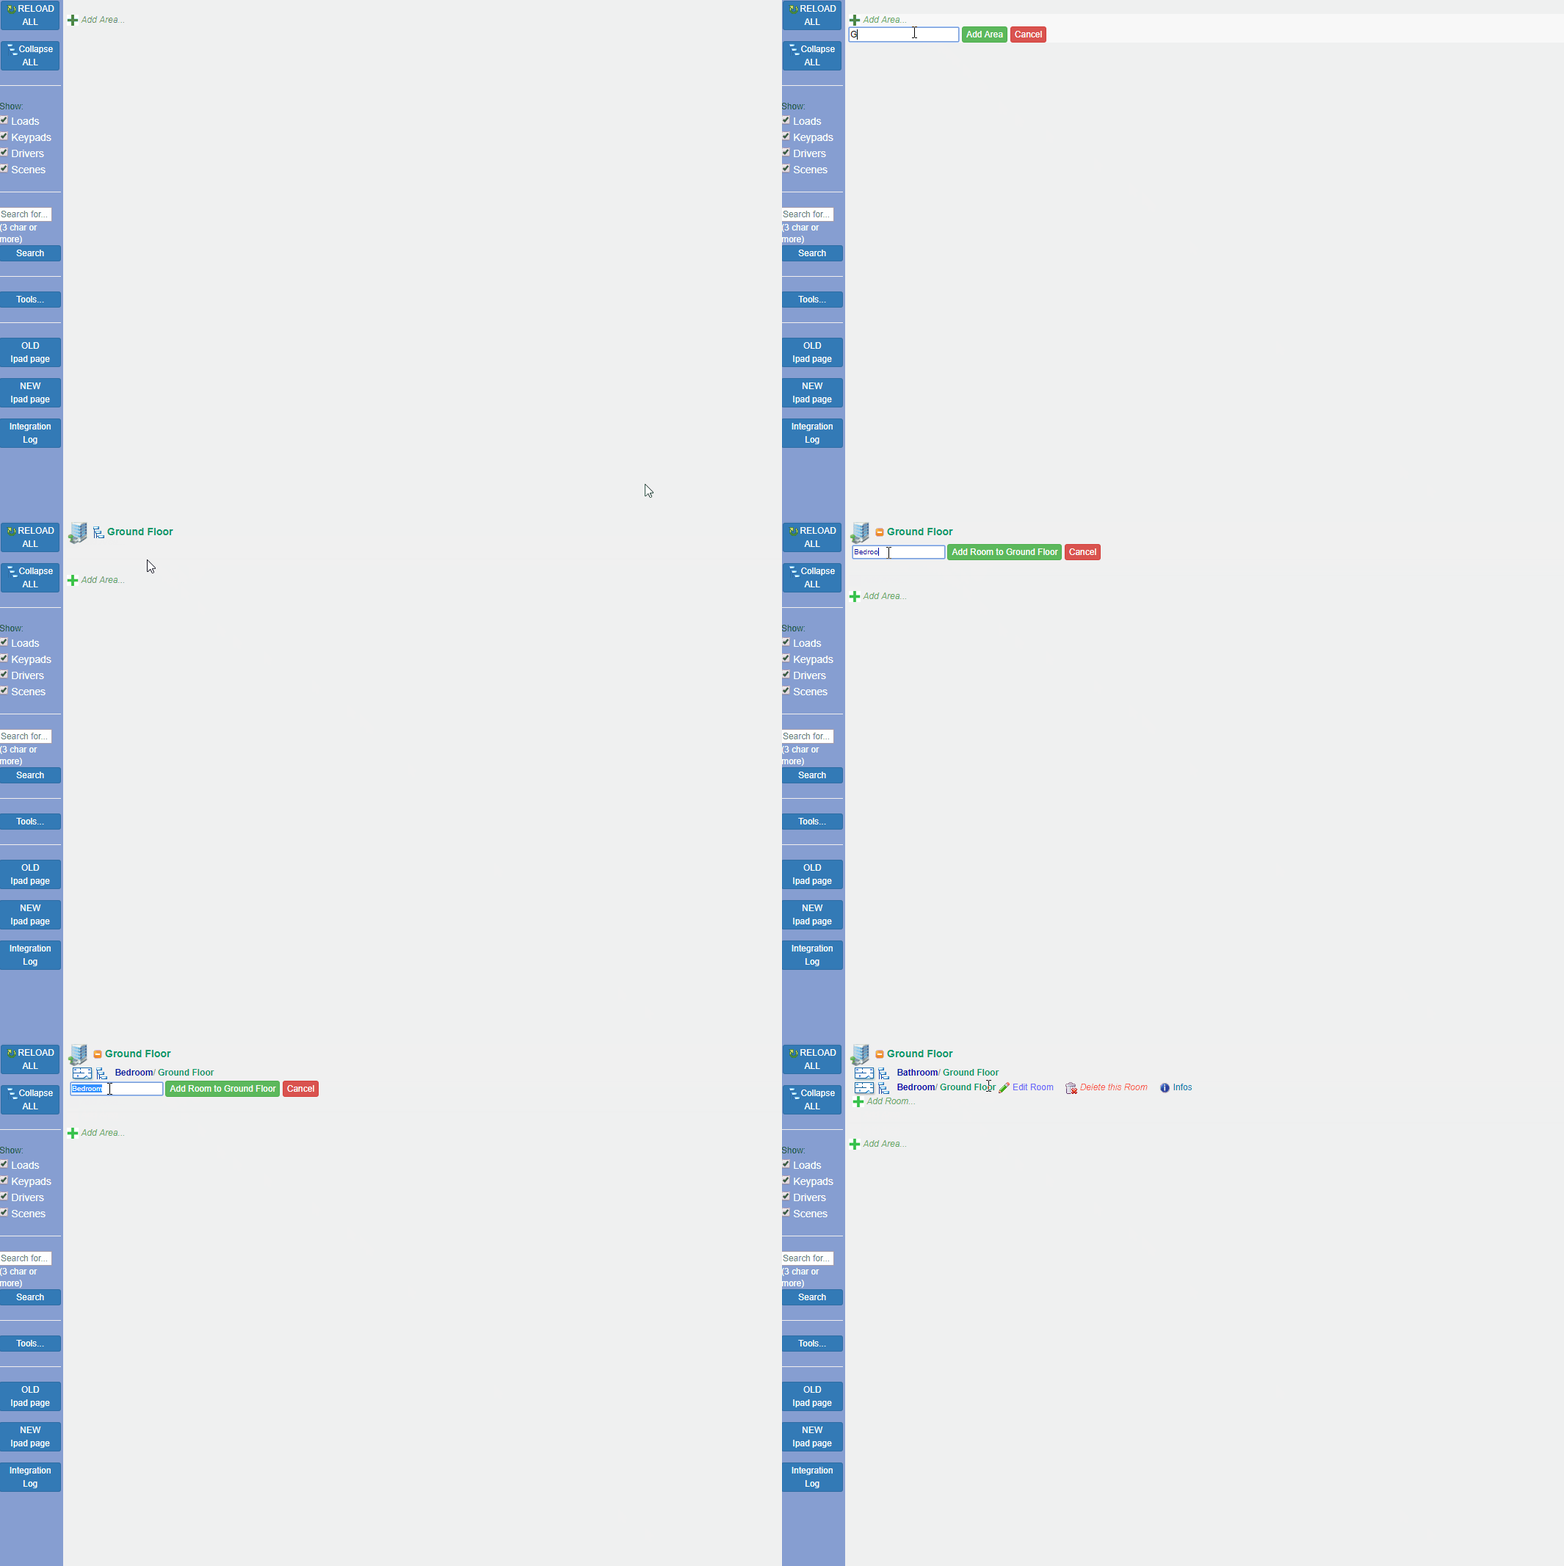
After connecting to the Gateway, create an area by clicking on the "+Add Area" button. Then add a room by clicking the "+Add Room" button.
# Create a Load
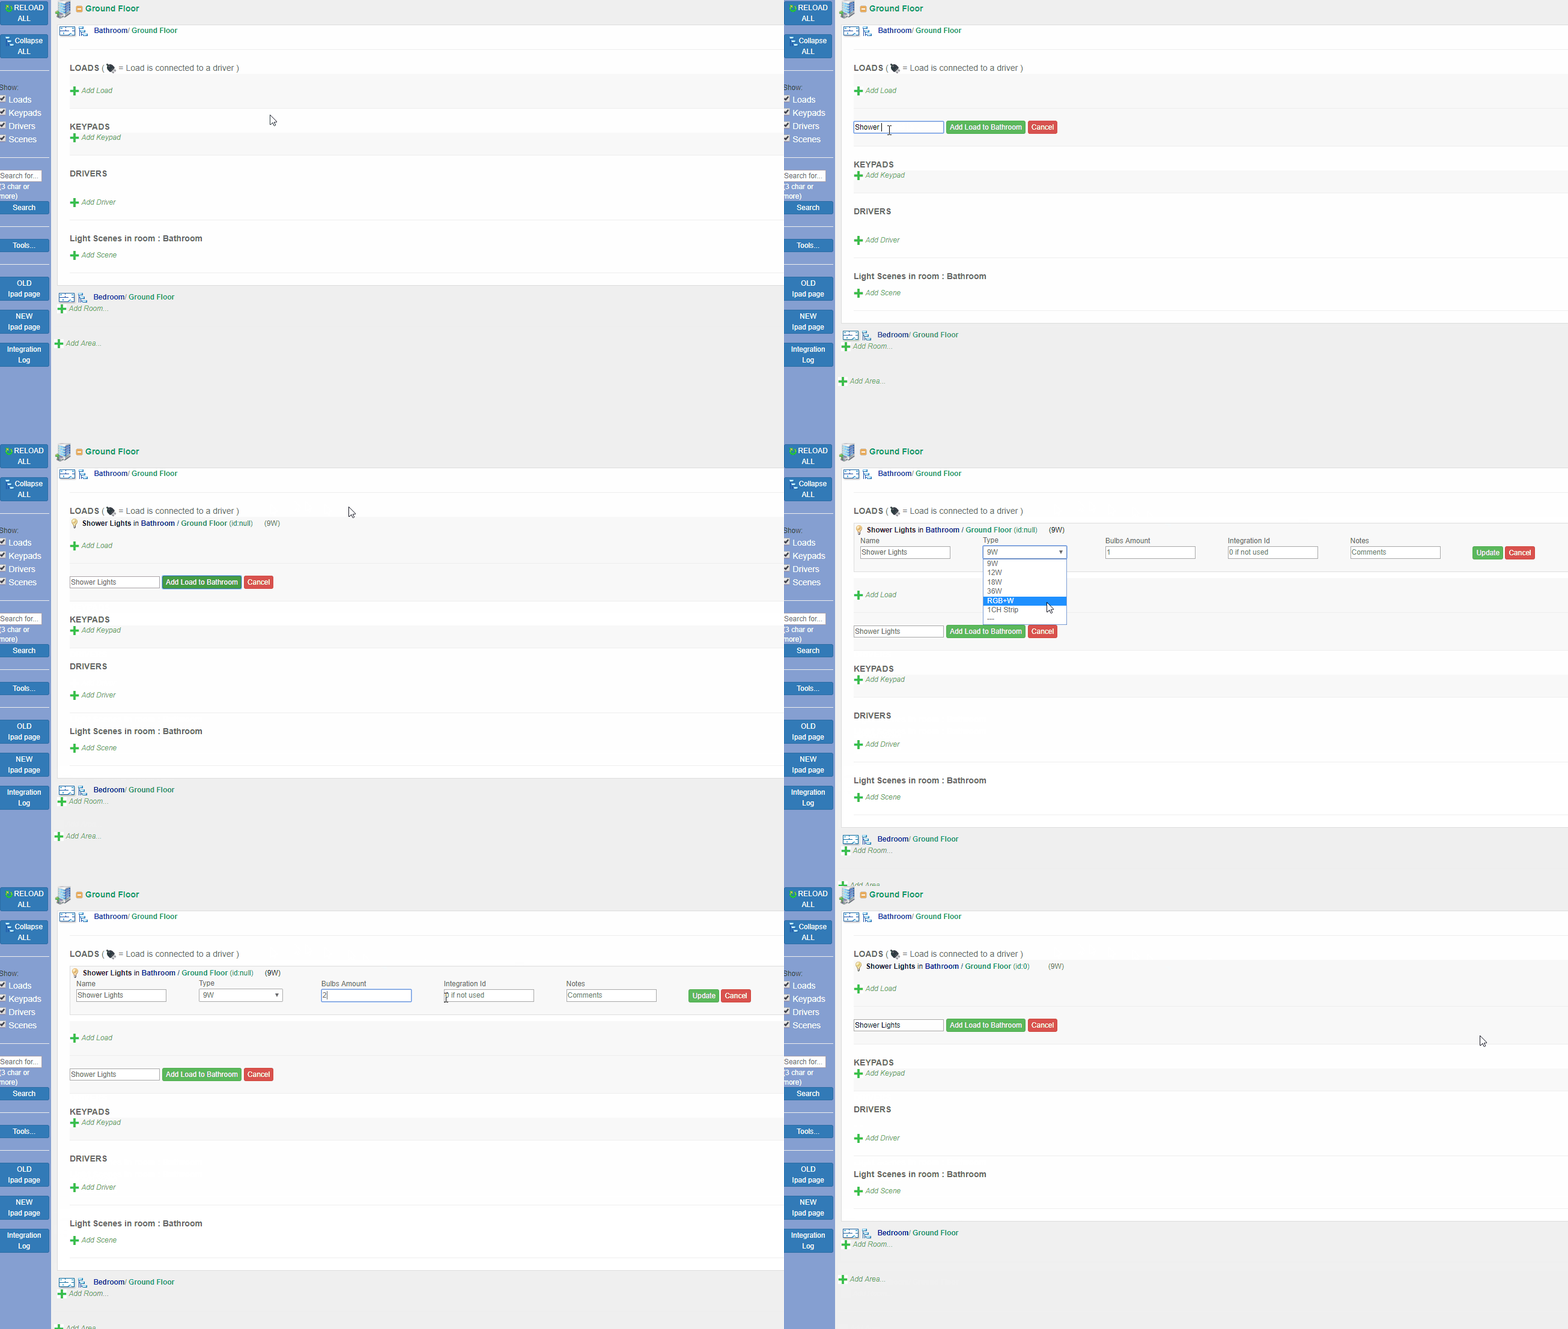
Once rooms have been created, you will need to add loads. Loads represent a light, or daisy chain of lights, connected to a single port of your DMX driver.
To add a load, just press the "+Add Load" button, then enter a name for the load and press the "Add load to Room" button next to the name. You can edit the load at any time. You'll just need to make sure you enter the specifications of your light. For example, if you are using a RGBW LED tape,in the drop down menu under 'Type', you will need to select your load as a RGB+W .
# Create a Driver
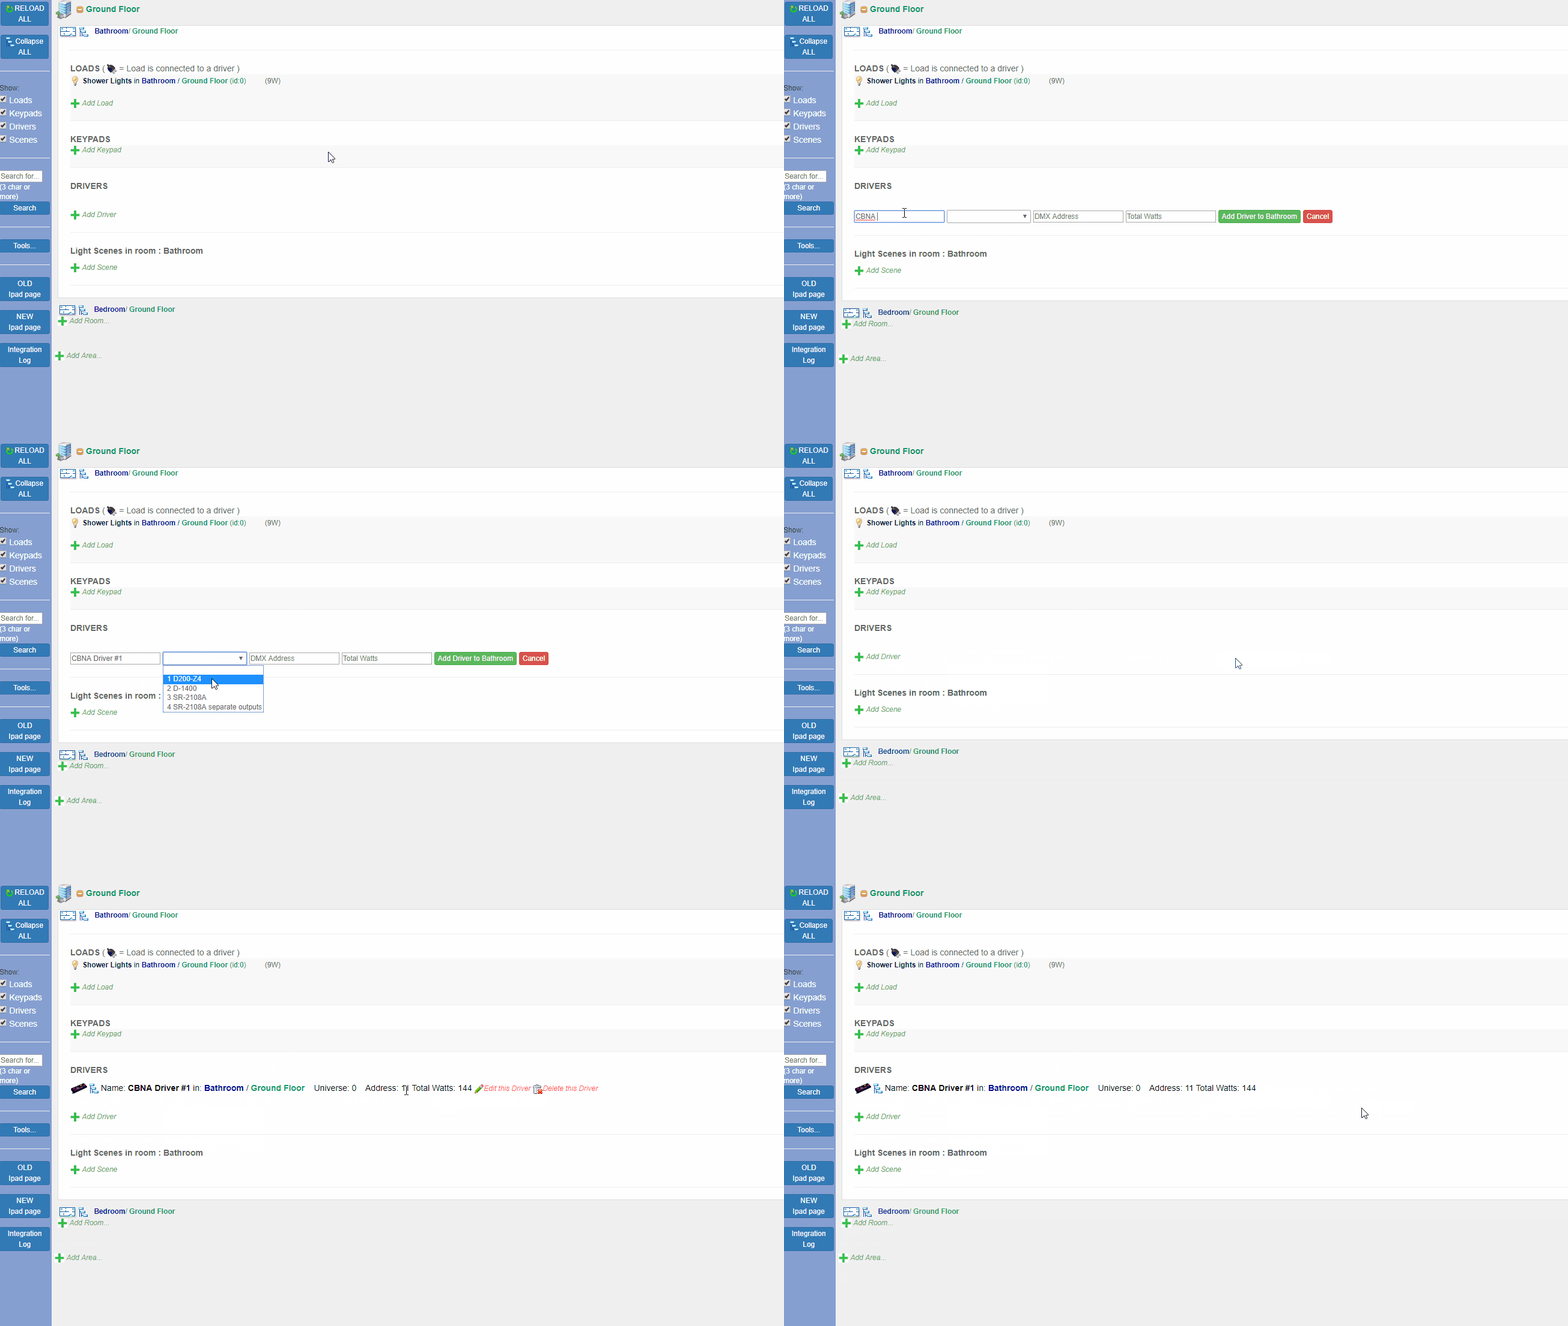
In order for the Gateway to configure the lights, it needs to know what address each DMX driver has been set to. A DMX address can be changed directly on the device.
To link a DMX driver to the GATEway the steps are as follows: press the "+Add Driver" button, give the driver a name, select the kind of driver you are using, enter the driver's DMX address, and then press the "Add Driver to Room" button. You can edit a driver at any time.
# Connect a Load to a Driver
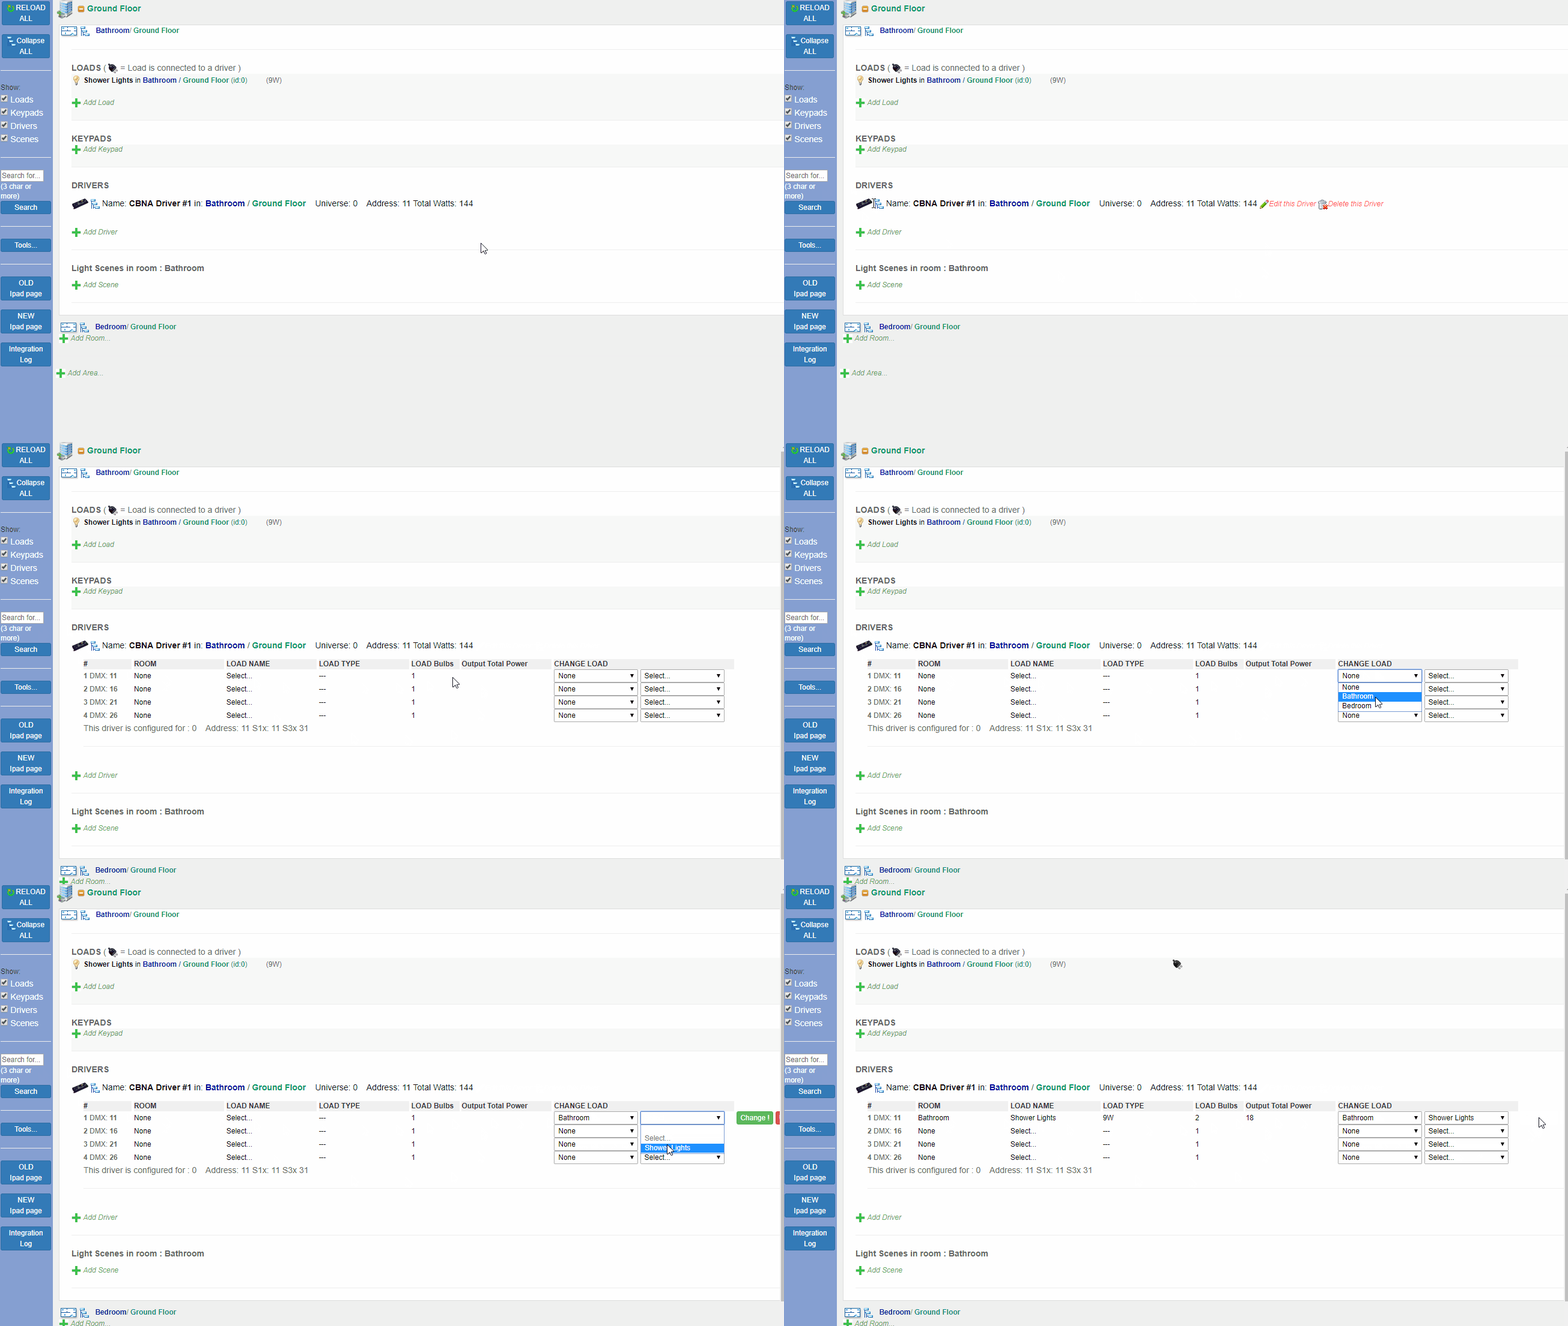
Once your driver has been created and configured, you will need to tell the software which load is connected to which driver. This is how the Gateway knows which DMX addresses it needs to control.
To do this, first click the expand button for the driver you're setting a load to. Then using the drop down menus, select the room and the load you want to set to that driver. Keep in mind that some drivers can be configured to control multiple loads, while others can only control a single load at a time.
# Create a Scene with Loads
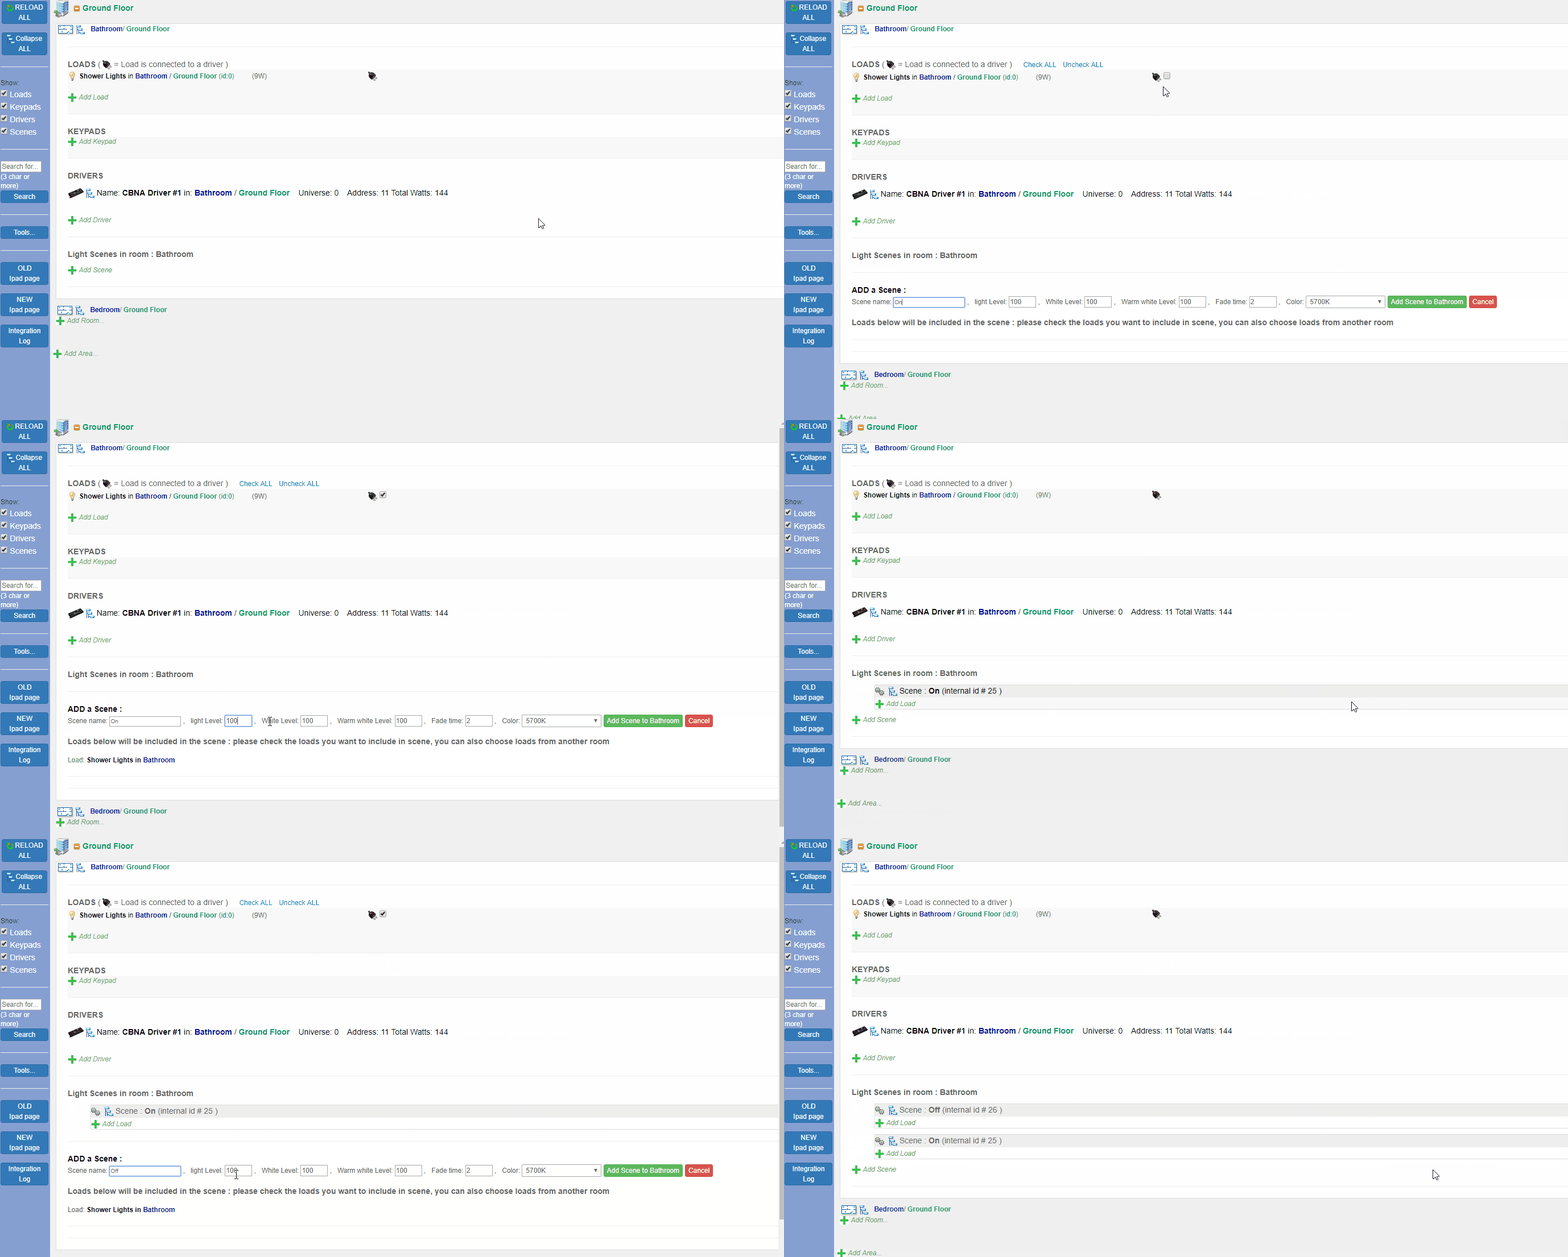
Scenes are configurations for your lights. You will want to configure multiple scenes depending on what your project is.
To create a scene, press the "+Add Scene" button, enter a name for your scene, enter the white and dim levels, and select a color for your scene. Before you press "Add Scene to Room", make sure to check the boxes of the loads which you want to include in that scene. Once all your loads are selected, then press the "Add Scene to Room" button. You can add or remove loads from a scene anytime after creating a scene as well.
Note
Not all lights in a given scene need to be the same color. You can set the color of each light for a given scene. This can be beneficial for a scene that includes LED tapes and luminaries. The color rendering isn't always exactly the same for different lights.
# Create a Virtual Keypad with Virtual Buttons
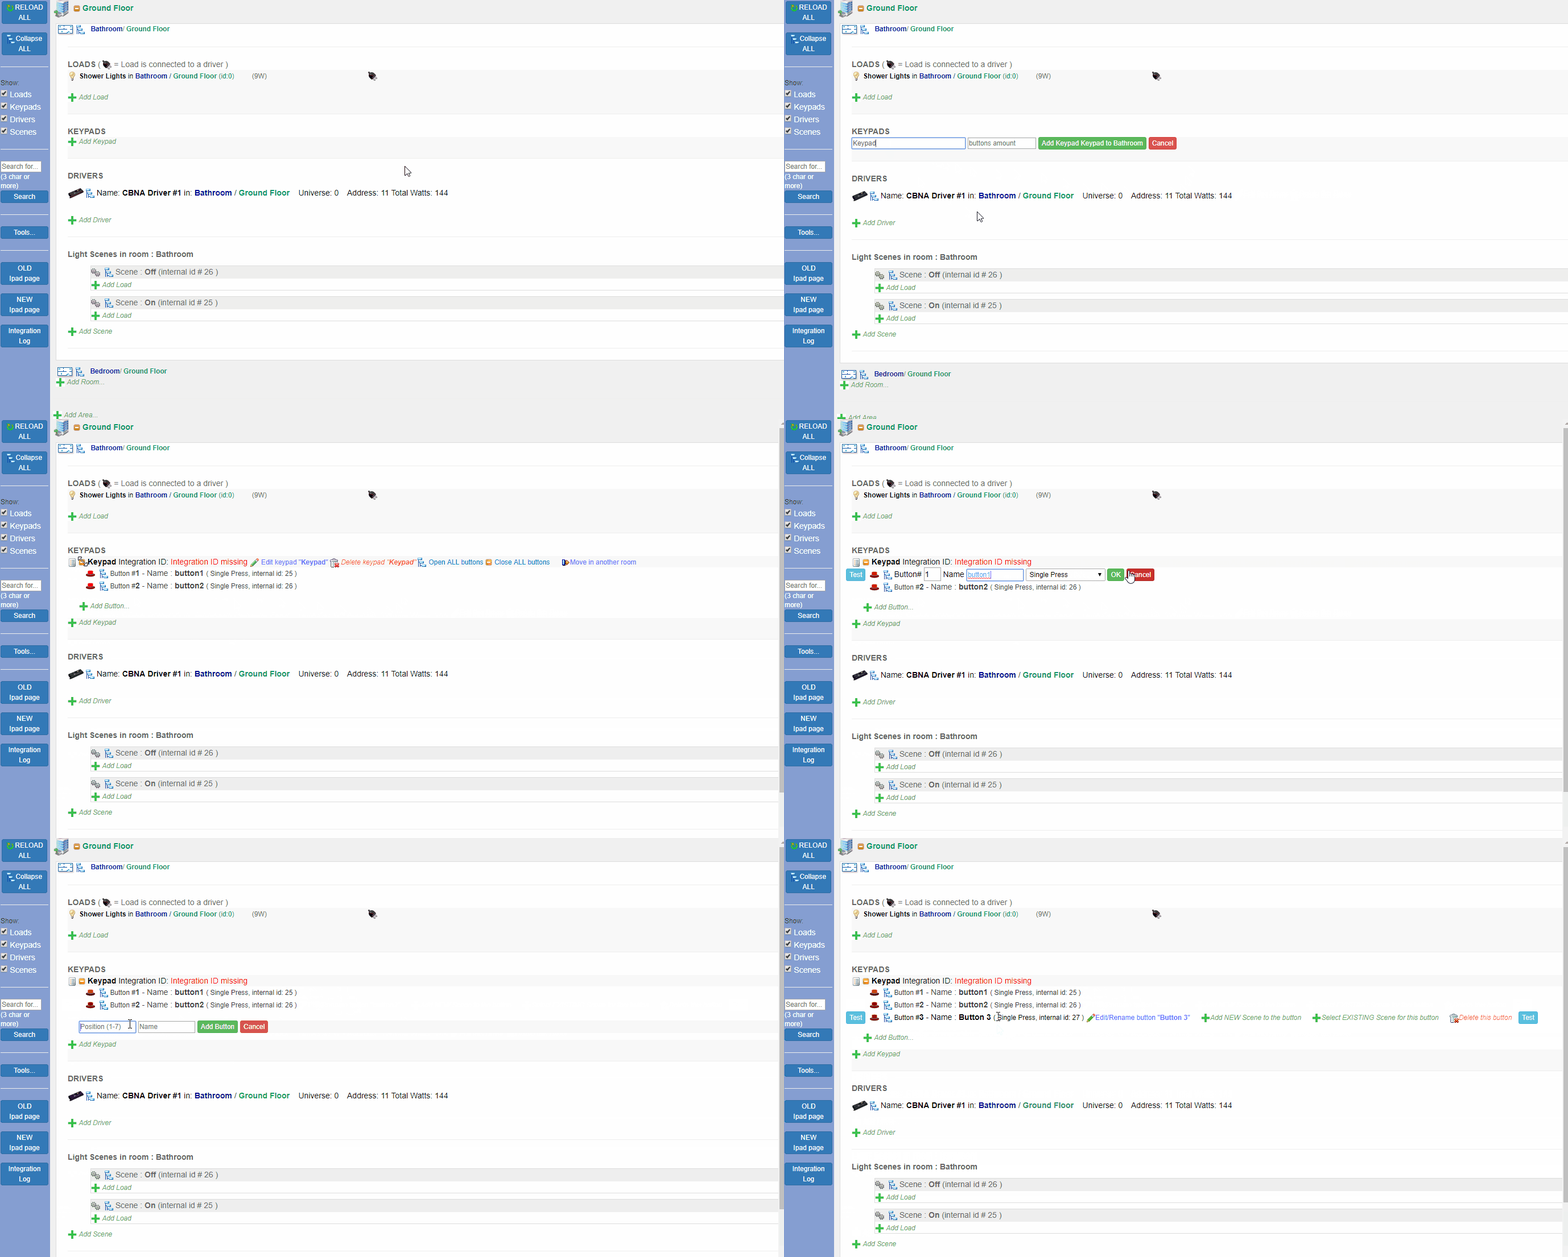
Keypads and buttons are a convenience tool meant to mimic the physical world, but also will appear on the Gateway's interactive page. They are strictly virtual, but they can be mapped to physical buttons with integration to 3rd parties.
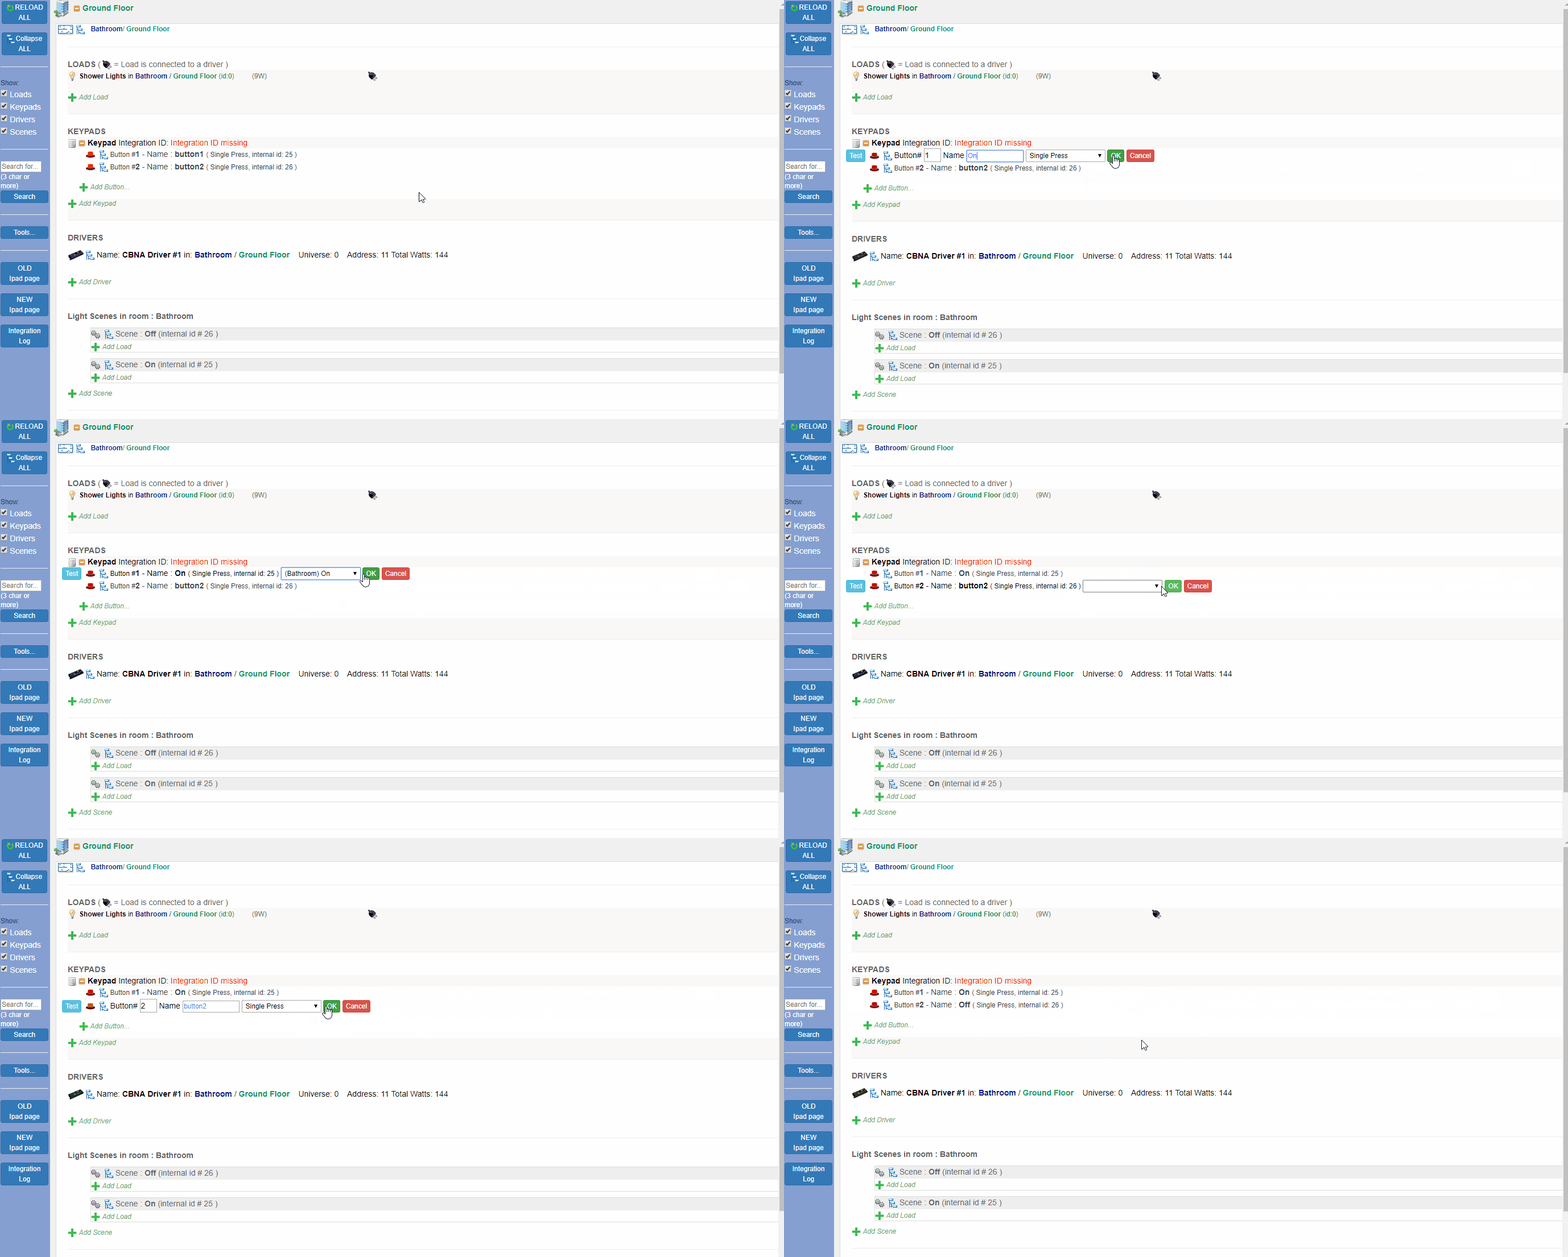
To create a keypad, press the "+Add Keypad" button, enter a name for your keypad, and then enter the amount of buttons you need. You can add buttons to a keypad once it has been created too. Then press the "Add keypad to Room" button to finish the creation of the keypad. Then edit the name of the buttons to reflect what you would like them to do.
Once the buttons have been created, you may edit them to be more than just an on/off button. Our virtual buttons have 5 different kinds of buttons:
# Single press button
The Single press button turns on the scene(s) attributed to it. It does this regardless of the current state of the loads.
# Multiple press button
The Multiple press button works like the Single press button, but instead of turning on all the scenes it has attributed to it, it only turns on one of the scenes. When it is pressed again it will turn on the next scene attributed to it, until it goes through all the scenes. Once it has cycled through all of its scenes it starts over.
# Toggle button
The Toggle button, also referred to as a Smart Toggle button, only affects the brightness of the scenes attributed to it. It is an on/off button. For example, if the scene's brightness is at 0%, the toggle button will set the scenes to 100% once pressed. If the scenes brightness is at 100%, the toggle button will set the scenes to 0% when pressed again.
# Raise button
The Raise button also only affects the brightness of the scenes attributed to it. But unlike the toggle button, it only increases the brightness of its scenes. You can also press and hold this button.
# Lower button
The Lower button, also only affects the brightness of the scenes attributed to it. But unlike the toggle button, it only decreases the brightness of its scenes. You can also press and hold this button.
# Connect a Scene to a Virtual Button
Once your scenes, keypads and buttons have been entered, the final step is to assign a scene to a button. This will allow you to switch on scenes with the virtual buttons. You may assign more than one scene to a button.
# Set a static IP
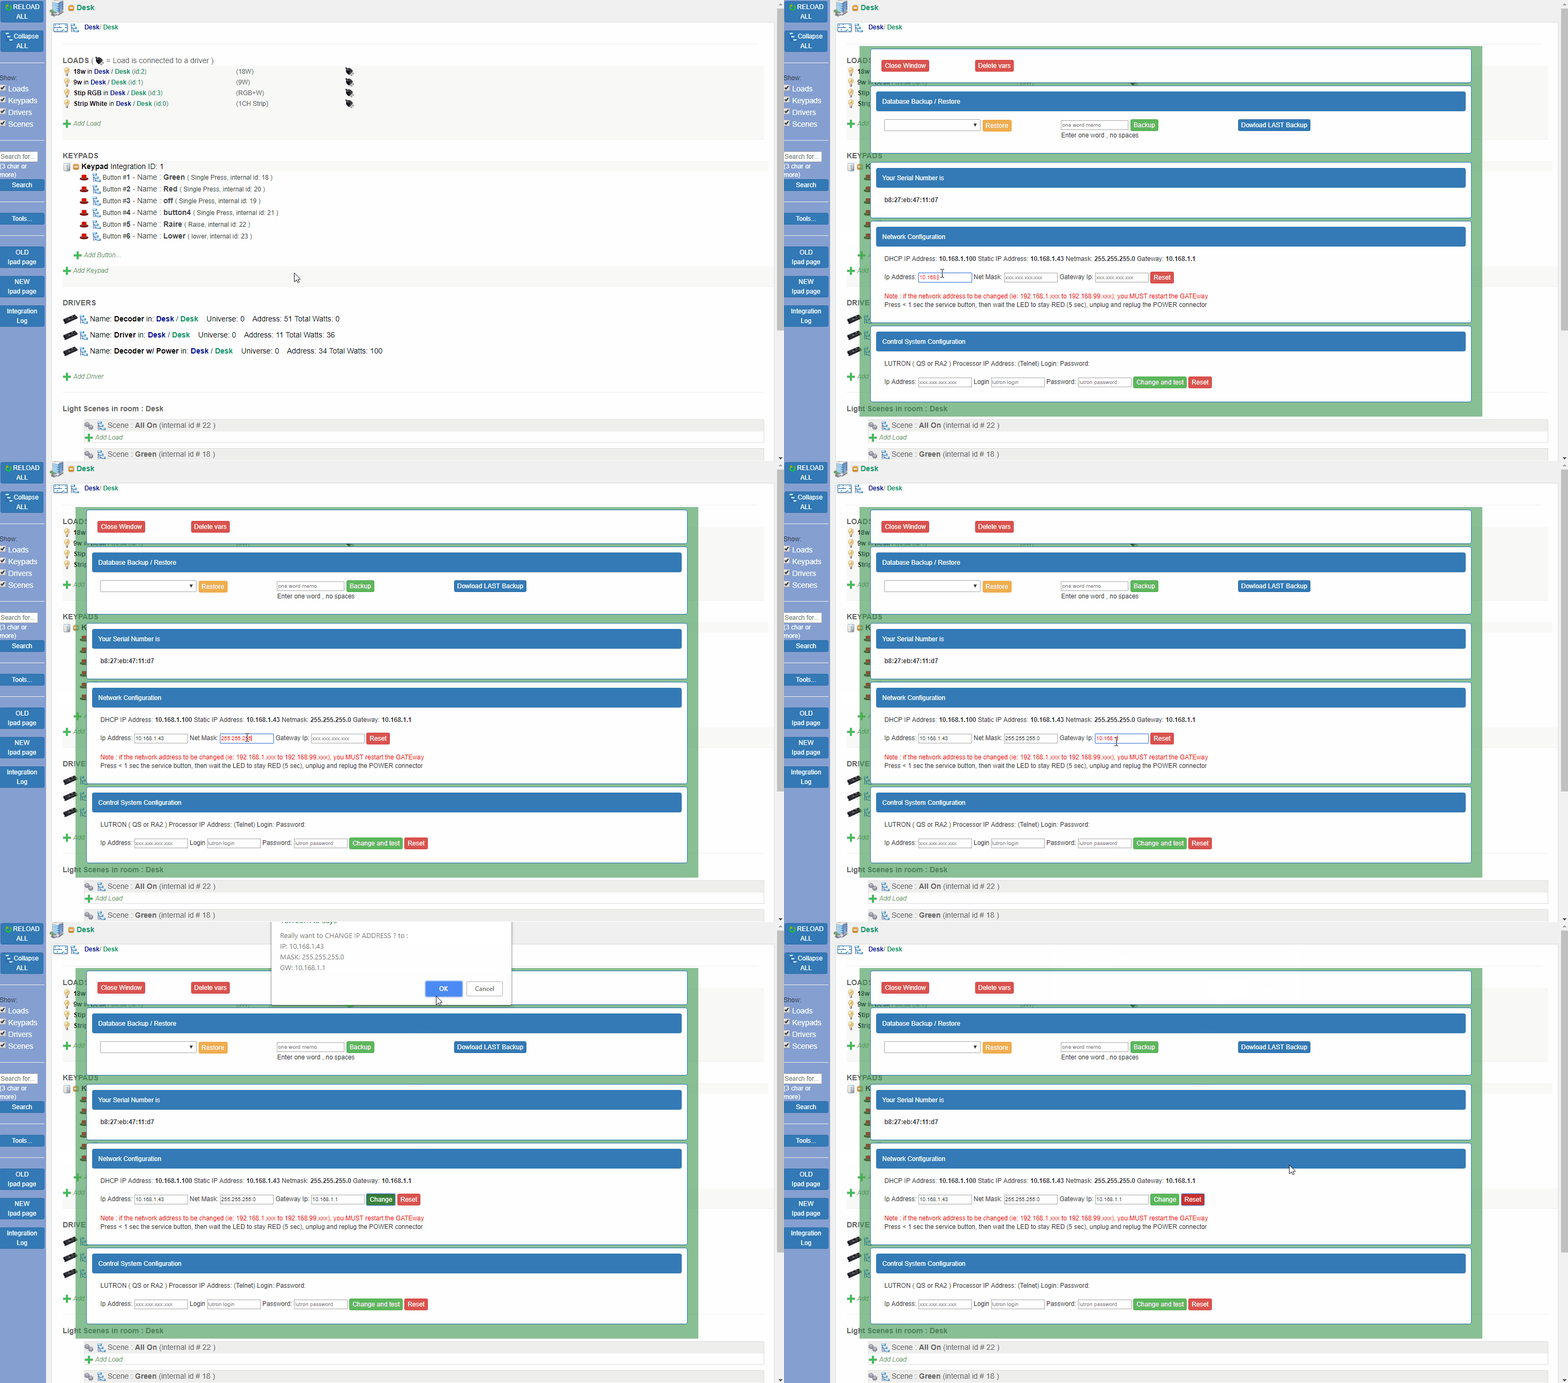
To set a static IP, go to the tools section, enter the fixed IP for your Gateway, enter the subnet mask, and then enter the default Gateway IP. Once this is done hit the 'Change' button to save the settings. For the settings to take effect, power cycle the Gateway. (If you wish to remove the settings, hit the 'Reset' button).
# Interactive Page
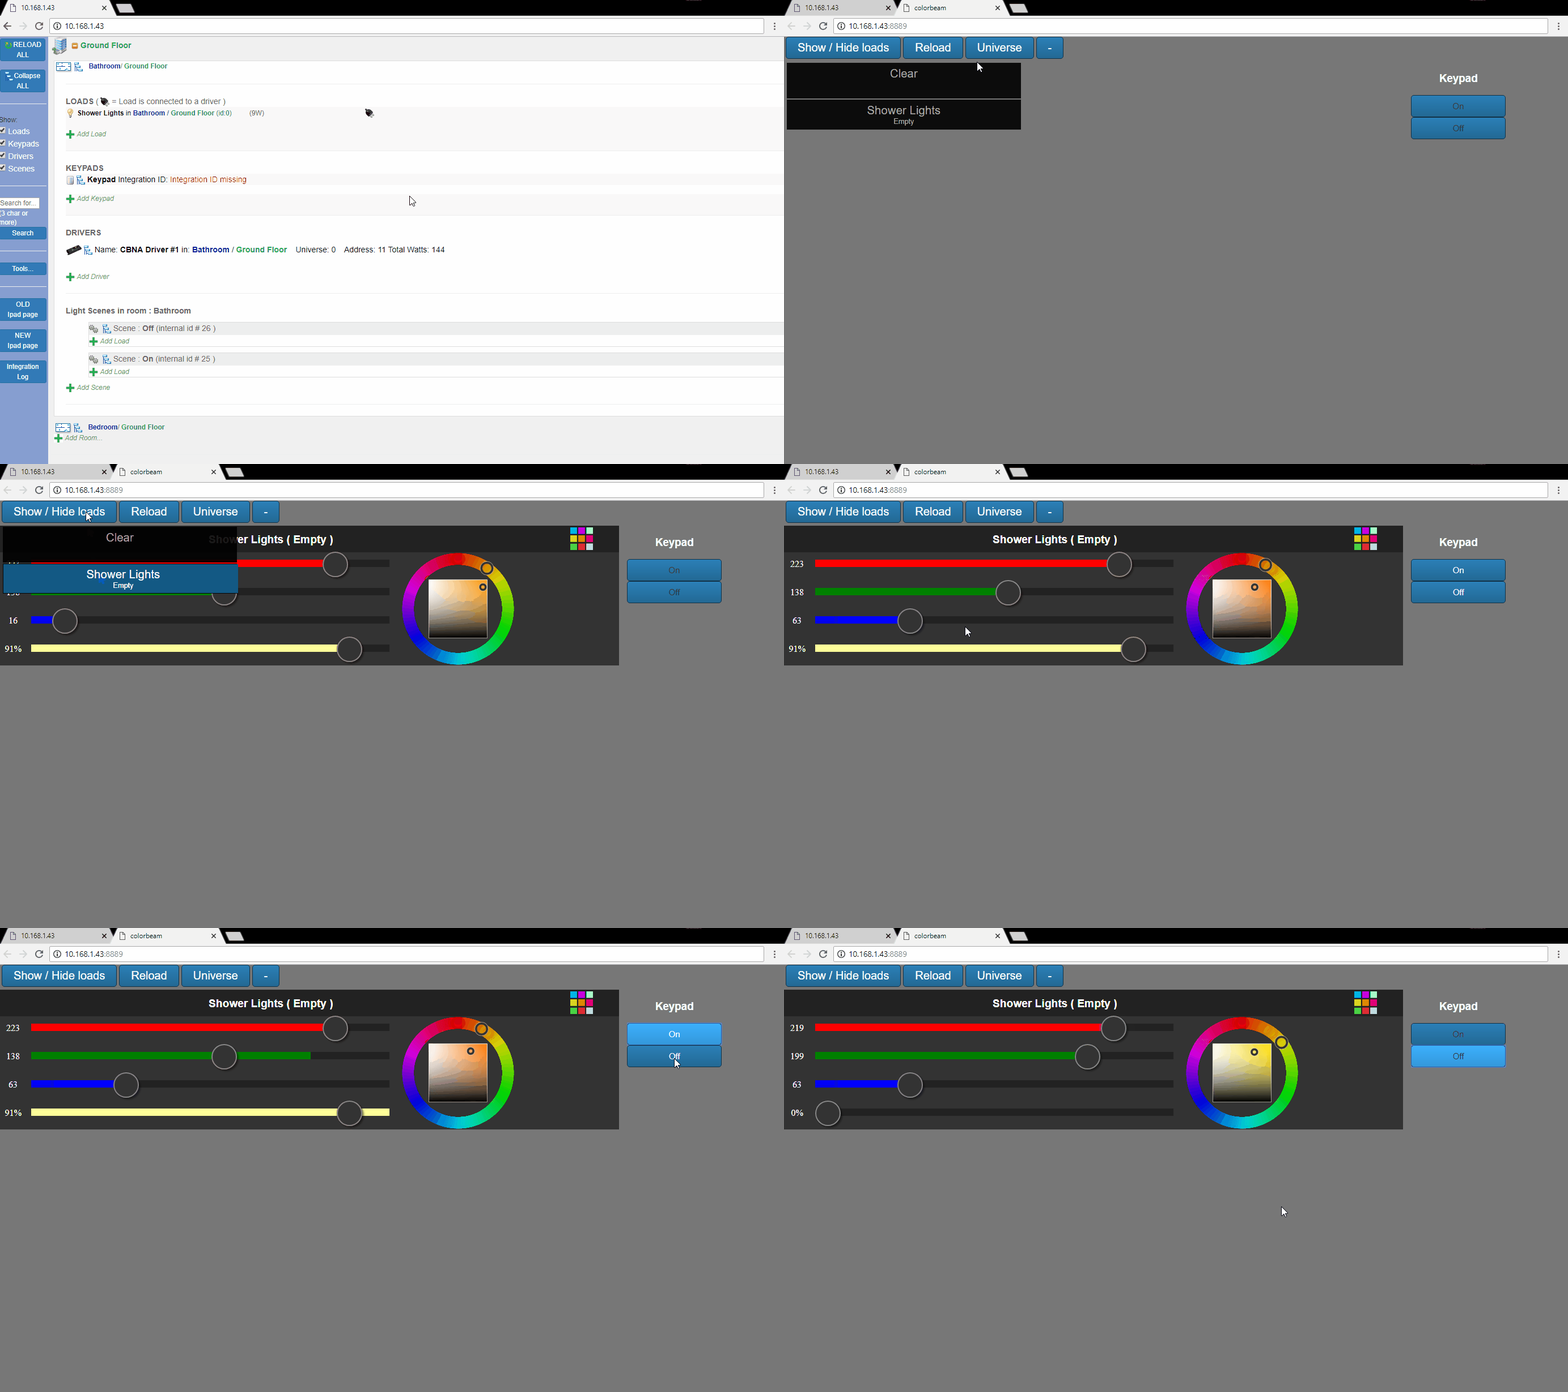
You may also want to change the colors of your loads directly. To do this, either go to port 8889 of the Gateway or you can press the "New iPad page" button on the Gateway's configuration page.
Example:
http://192.168.0.101:8889
# Log Page
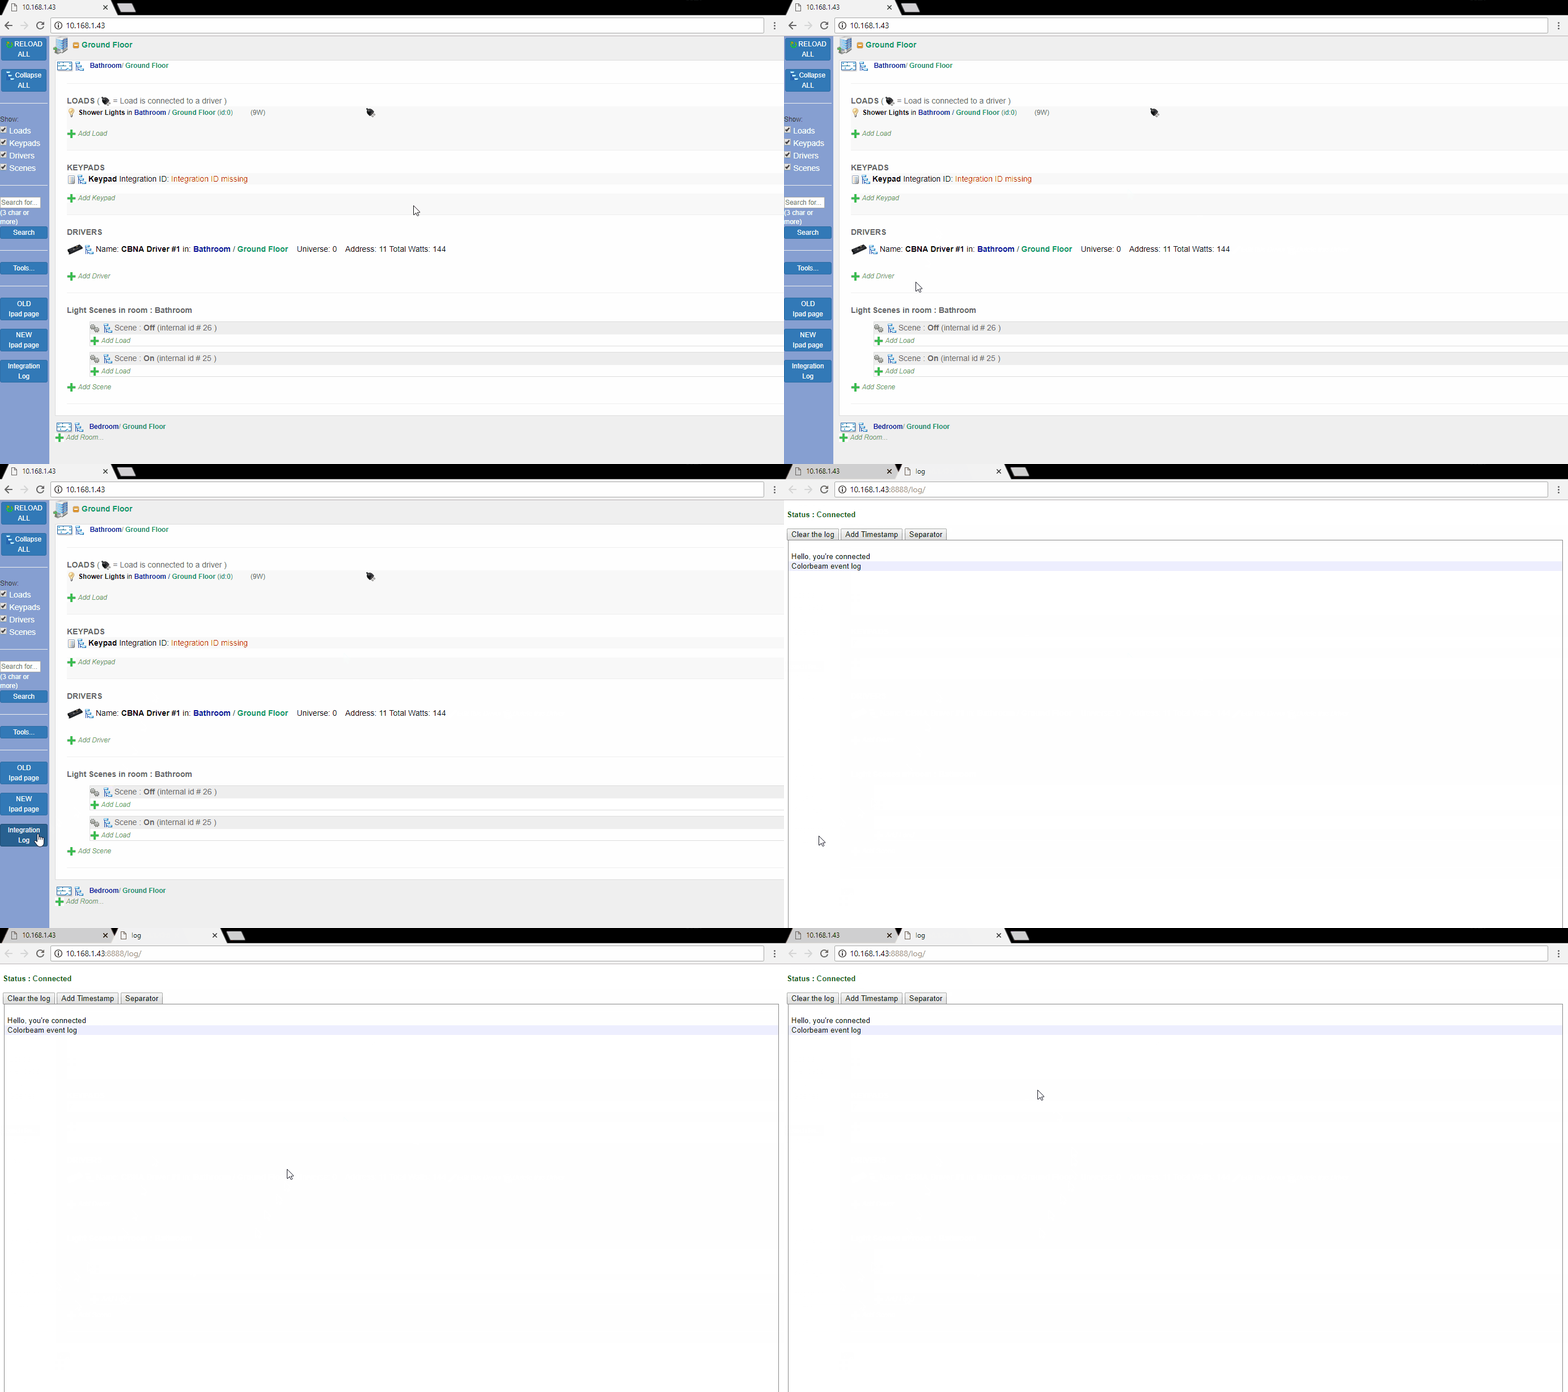
To access the Gateway's log page, you will need to go to port "8888/log/" or press the "Integration Log" button on the Gateway's configuration page.
Example:
http://192.168.0.101:8888/log/
